
Upgrading your home with modern materials can greatly improve its look and value. Many people worry about renovation projects. But, learning how to install laminate flooring is easy with basic tools.
This method lets you get a top-notch finish without the cost of hiring pros.
This easy laminate flooring installation guide will boost your confidence. It’s all about planning well for a lasting renovation. Embrace the challenge and enjoy making your home beautiful and durable.
Essential Preparation and Tools for Success
Getting a professional look starts before you lay the first plank. Good preparation is the foundation of any successful project. It ensures your floor lasts long and looks great. Follow this laminate flooring installation tutorial to avoid problems like buckling or squeaking.
Gathering Necessary Equipment and Materials
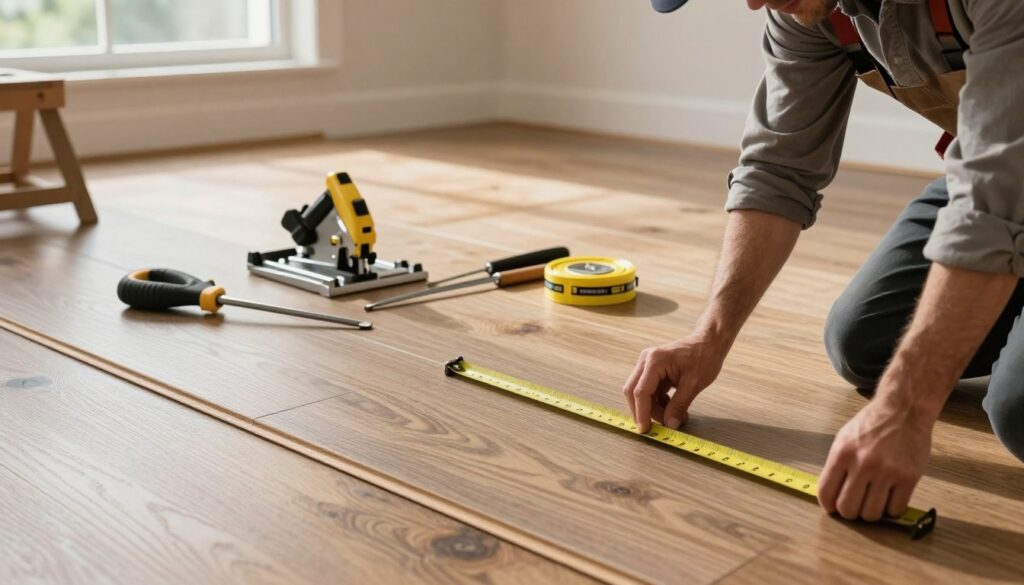
Before starting your diy laminate flooring project, make sure you have all the right tools. The right equipment prevents delays and keeps your project moving smoothly. Check the table below to see what you need.
| Tool Category | Essential Item | Primary Purpose |
| Measuring | Tape Measure | Ensuring accurate cuts |
| Installation | Tapping Block | Protecting plank edges |
| Spacing | Expansion Spacers | Maintaining perimeter gaps |
| Cutting | Jigsaw or Saw | Sizing planks to fit |
Acclimating Your Laminate Planks
One step often overlooked in laminate flooring installation is acclimation. Let your new planks adjust to your home’s temperature and humidity for at least 48 hours. This step prevents the material from expanding or contracting after installation.
Just place the unopened boxes in the room where you’ll be working. Consistency is key for a stable floor. Skipping this step can lead to gaps or warped boards later.
Preparing the Subfloor Surface
A smooth, clean, and level subfloor is key for a great diy laminate flooring job. Remove any debris, staples, or old adhesive before starting. If the floor is uneven, use a leveling compound to fix it.
Also, check for moisture issues to protect your investment. A dry subfloor is essential for your laminate flooring installation tutorial success. Once the surface is ready, you can start with confidence.
How to Install Laminate Flooring: A Step-by-Step Guide
Transforming your room starts with the precise installation of your chosen laminate planks. Learning how to install laminate flooring correctly ensures that your investment lasts for years while maintaining a high-end appearance. This process requires patience and a steady hand to achieve the best results.
Laying the Underlayment Foundation
Before you place a single plank, you must roll out your underlayment. This layer acts as a crucial moisture barrier and provides essential sound insulation for your home. Ensure the seams are butted together tightly and secured with moisture-resistant tape.
Do not overlap the underlayment, as this creates uneven spots that can damage your locking system later. A smooth, flat surface is the secret to a professional-looking floor.
Positioning the First Row of Planks
Begin your laminate floor installation guide by placing the first row along the longest, straightest wall. Always use spacers to maintain a 1/4-inch expansion gap between the planks and the wall. This gap allows the floor to expand and contract naturally with temperature changes.
“Quality installation is not just about speed; it is about respecting the material’s need to breathe and settle within the room’s environment.”
Locking Subsequent Rows into Place
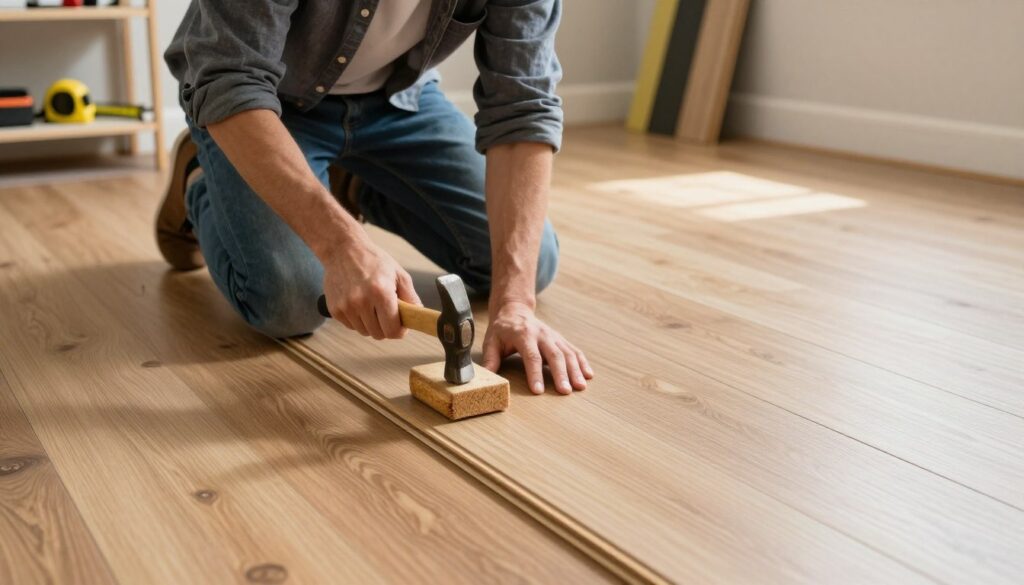
Modern flooring uses a click-lock system that makes assembly efficient. Angle the tongue of the new plank into the groove of the previous row and press down firmly until you hear a distinct click. This sound confirms that the joint is secure and locked into position.
If you encounter resistance, check for debris in the groove before forcing the plank. Using a tapping block and a rubber mallet can help close stubborn gaps without damaging the delicate edges of the laminate.
Cutting Planks for Perfect Fit
You will inevitably need to trim planks to fit against walls or around corners. Measure twice and mark your cut line clearly with a pencil to ensure accuracy. A jigsaw or a miter saw is ideal for making clean, straight cuts that look seamless.
When working through this laminate flooring step by step process, always keep the cut side facing the wall. This hides any minor imperfections under your baseboards, leaving you with a clean, professional finish that enhances the value of your home.
Managing Transitions and Obstacles
When you hit doorways, pipes, and different floor levels, precision is key. Getting that high-end look isn’t just about laying planks. Mastering these laminate flooring installation tricks makes your project shine.
Navigating Doorways and Door Jambs
One top laminate flooring tip is undercutting door jambs. Instead of cutting planks to fit the trim, slide the flooring under it.
Use a flooring scrap as a guide to mark the jamb. Then, cut the wood carefully to make a smooth gap. This lets the plank slide under, hiding the expansion space for a pro finish.
Installing Flooring Around Pipes and Vents
Remember, laminate needs room to expand and contract. Always leave a small gap around pipes and vents to avoid buckling.
For pipes, drill a hole a bit bigger than the pipe. Use a decorative cover or color-matched silicone to seal it neatly. These laminate floor installation tips keep your floor safe and looking good.
Transitioning Between Different Floor Types
When moving from one room to another, you often face different surfaces like tile or carpet. The right transition molding is key for a safe and attractive link.
These moldings cover height differences and allow for movement between materials. Check the table below to pick the right profile for your needs.
| Transition Type | Best Use Case | Height Difference |
| T-Molding | Same-height floors | None |
| Reducer | Laminate to thinner floor | Small to Medium |
| Carpet Trim | Laminate to carpet | Variable |
| End Cap | Laminate to sliding door | High |
Securing these transitions right ensures your laminate floor installation tips lead to a durable, lasting surface. Always follow the manufacturer’s advice for the best results at home.
Professional Finishing Touches
After laying down the main planks, your room starts to transform. The final steps are key to a easy laminate flooring installation that looks professional. They hide expansion gaps and protect your subfloor from moisture and debris.
Installing Baseboards and Quarter Round
Laminate flooring needs a small gap around the edges for expansion. Baseboards or quarter round molding can cover this gap. Always nail the trim into the wall, not the floor, to let the planks move freely.
Use a miter saw for clean cuts at corners for a seamless look. If walls are uneven, paintable caulk can fill the gap. This is a top laminate flooring tip for a polished finish.
Installing Flooring Around Pipes and Vents
When you hit obstacles like radiator pipes or floor vents, precision is essential. Cut the laminate planks to fit around these items, keeping the expansion gap. Decorative escutcheon plates are great for covering pipe spaces, giving a clean look.
For floor vents, cut the opening a bit larger with a jigsaw. Then, replace the vent cover to hide any cut imperfections. These laminate floor installation tips keep your floor stable and looking good, even in tough spots.
Cleaning and Maintaining Your New Floor
Keeping your new floor beautiful is easy with a regular routine. Start by sweeping or vacuuming with a hard-floor setting to remove dirt. Avoid using too much water, as it can damage the joints over time.
For deeper cleaning, use a laminate floor cleaner approved by the manufacturer. Apply it with a damp microfiber mop. Never use wax or oil-based polishes, as they can dull the floor. With these simple steps, your floor will stay shiny and durable for years.
Troubleshooting Common Installation Issues
Even the most careful diy laminate flooring projects can run into minor snags. Small errors during installation are common. But, most problems are easy to fix with the right tools and patience.
Fixing Gaps Between Planks
Gaps can appear due to temperature changes or planks not clicking together fully. Use a pull bar and a rubber mallet to tap planks into place. If gaps remain, use wood filler or laminate repair paste for a seamless look.
Addressing Uneven or Bouncy Sections
Bouncy spots often mean the subfloor wasn’t level before installation. If you notice movement, remove planks to check the underlayment. Making sure the subfloor is flat is key to avoiding future problems.
Repairing Damaged Laminate Surfaces
Scratches or chips can happen from daily wear and tear. For minor scratches, a laminate repair kit or wax crayon works well. Deep gouges might need a plank replacement, so keep extra pieces handy.
| Issue | Primary Cause | Recommended Solution |
| Visible Gaps | Incomplete locking | Use pull bar and mallet |
| Bouncy Floor | Uneven subfloor | Level subfloor surface |
| Surface Scratches | Heavy furniture | Apply wax repair kit |
| Deep Gouges | Impact damage | Replace damaged plank |
Following these maintenance tips keeps your floors looking great for years. Proper care during installation makes a big difference. Fixing small problems early prevents bigger issues later.
Conclusion
Changing your living space needs careful planning and steady work. This guide on laminate floor installation is your starting point. It helps you achieve lasting, high-quality results.
Success comes from precise measurements and the right subfloor prep. Each plank you lay adds to your home’s durability and beauty. Now, you can tackle complex cuts and smooth transitions with confidence.
Keep this guide handy for your next renovation. Regular practice sharpens your skills and keeps your floors looking great for years. Your hard work makes your home more valuable and comfortable.
Be proud of the work you’ve done in your newly updated rooms. Share your stories with friends or family who want to improve their homes. Your skills show that you can achieve professional results.
FAQ
How long should I acclimate the planks before starting my laminate flooring installation?
For a successful diy laminate flooring project, experts like Mohawk and Pergo suggest acclimating your planks for at least 48 hours. This step is key to prevent warping or buckling. It lets the material adjust to your home’s humidity and temperature.
What are the essential tools required for how to install laminate flooring properly?
You’ll need a rubber mallet, a tapping block, a pull bar, and spacers. Brands like Roberts or Wolfcraft are recommended. They help ensure tight seams and protect the tongue-and-groove locking systems.
Can I perform an easy laminate flooring installation over existing carpet?
No, installing laminate over carpet is not allowed. The subfloor must be clean, dry, and flat. Remove the carpet and padding first. Then, make sure the surface is level before starting your laminate flooring step by step guide.
Do I need a separate underlayment if my planks have a pre-attached backing?
If your planks have pre-attached padding, like Shaw Floors, you might not need extra underlayment. But, concrete subfloors might require a 6-mil poly film moisture barrier. Always check the manufacturer’s laminate flooring tips to keep your warranty valid and ensure sound insulation.
Why is it necessary to leave expansion gaps around the perimeter of the room?
Laminate floors expand and contract with temperature and humidity changes. Leaving a 1/4-inch to 3/8-inch gap against walls and fixed objects is key. This gap is hidden by baseboards or Zamma quarter round molding for a clean look.