
That constant drip-drip sound in your kitchen or bathroom is more than just an annoyance. It represents wasted water and rising utility bills that add up over time. Taking action immediately helps conserve precious resources while protecting your home from unnecessary plumbing expenses.
Most drips stem from simple internal component wear. You do not need specialized training or expensive tools to resolve these common issues. This self-fix leaky faucet guide provides clear, professional steps to restore your fixtures efficiently.
By following these instructions, you can learn how to fix a leaky faucet yourself without calling a plumber. Mastering these basic maintenance skills empowers homeowners to handle minor repairs with confidence. Let’s dive into the simple process of restoring your plumbing system today.
Essential Tools and Safety Preparations
Starting a repair right is key. Organizing your workspace is a big step in any diy faucet repair project. It makes the job easier and less stressful.
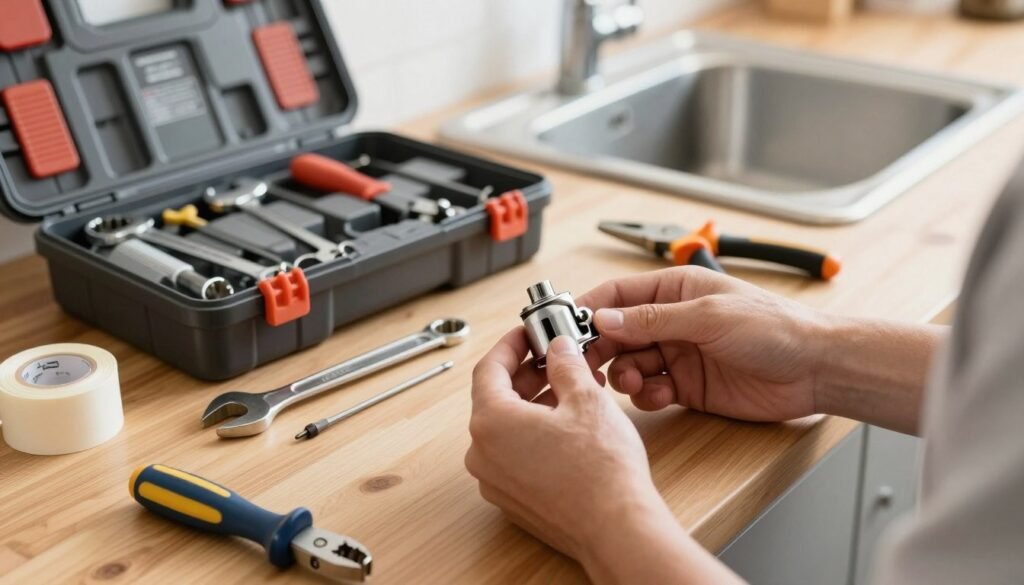
Gathering Your Plumbing Toolkit
To fix a leak, you need the right tools. You’ll need an adjustable wrench, screwdrivers, and needle-nose pliers. Also, have replacement parts that fit your faucet.
Following handyman tips for faucet leaks can save you time. Keep a flashlight handy for dark spots. Having everything ready lets you focus on the repair.
Turning Off the Water Supply
Shut off the water before you start. Find the shut-off valves under your sink and turn them clockwise. This stops water from flowing while you work.
If there are no valves under the sink, turn off the main water supply. Always test the faucet after closing the valves. This is a critical safety step.
Protecting Your Sink and Drain
Protecting your workspace is important. Small parts can fall down the drain. Place a towel over the drain or use a sink plug before starting.
This keeps your parts safe and prevents clogs. Taking these precautions makes the repair simpler. With your tools ready and the drain covered, you’re set to start.
Identifying Your Faucet Mechanism
Every plumbing repair tutorial for faucet leaks starts with a key step: figuring out your faucet’s type. Different models have unique parts, so picking the wrong one can cause trouble. This self-fix leaky faucet guide helps you get the right parts first.
Understanding Compression Faucets
Compression faucets are old and common in many homes. They have two handles and use a rubber washer to stop water flow.
“The simplicity of a compression faucet is its greatest strength, yet the rubber washer is often the first component to fail under pressure.”
When you turn the handle, it presses the washer against the valve seat. If your faucet leaks, the washer might be worn or hardened.
Recognizing Ball, Cartridge, and Disc Faucets
Modern homes often have washerless faucets, which are more complex. You need to look at the handle’s movement and how many handles there are to identify them.
- Ball Faucets: These have a single handle that moves over a rounded cap. They contain many small springs and seals.
- Cartridge Faucets: These can have one or two handles. They use a plastic or brass cartridge to control water flow.
- Disc Faucets: These are high-end, single-handle units that use two ceramic discs to regulate water.
Locating the Manufacturer Information
Finding the brand name is the last step in your do-it-yourself faucet leak solution. Most brands put their logo on the faucet’s base or handle.
If you can’t find a logo, check the underside of the spout or a small plastic cap on the handle. Knowing the brand and model makes it easier to find the right repair kit at the hardware store.
How to fix a leaky faucet yourself
Now, you’re ready to explore your faucet’s inner workings to stop that drip. Learning how to fix a leaky faucet yourself is a skill that saves time and money. By following these steps, you can make your plumbing watertight again.
Step One: Removing the Faucet Handle
First, find the decorative cap on top of the handle. It usually hides a small screw. Use a flat-head screwdriver to gently pry it off, revealing the screw underneath. Then, use the right screwdriver or hex key to loosen the screw and lift the handle.
Step Two: Accessing the Internal Components
With the handle off, you’ll see the faucet’s inner parts. This area has a decorative bonnet or a metal nut that holds the internal valve in place.
Removing the Packing Nut
Next, use an adjustable wrench to loosen the packing nut. Turn it counter-clockwise while holding the faucet steady with your other hand. Be gentle to avoid damaging the threads.
Extracting the Cartridge or Stem
After loosening the nut, pull the cartridge or stem assembly straight up and out. If it’s stuck, use pliers to help it come out. Check for any cracks or wear on the piece.
Step Three: Replacing Worn Washers and O-Rings
This step-by-step faucet leak fix involves replacing the small rubber parts that seal. Use a small pick or screwdriver to remove the old O-rings or washers. Make sure to match the new parts exactly to the old ones for a perfect fit.
Step Four: Cleaning Mineral Deposits and Debris
Hard water can leave mineral buildup that prevents a tight seal. Use a soft brush and white vinegar to clean the valve seat and the faucet body. This cleaning step is key to preventing future leaks.
Step Five: Reinstalling the Faucet Components
Put the new cartridge or stem back into the housing, making sure it’s aligned correctly. Tighten the packing nut firmly but avoid over-tightening. Then, reattach the handle and replace the decorative cap to finish this plumbing repair tutorial for faucet leaks.
| Component | Common Issue | Action Required |
| Rubber Washer | Compression wear | Replace immediately |
| O-Ring | Dry rot or cracks | Install new seal |
| Valve Seat | Mineral buildup | Clean with vinegar |
Troubleshooting Common Reassembly Issues
Fixing small plumbing problems at home can be a learning experience. Even with careful work, diy faucet repair might not always go smoothly. It’s important to stay calm and methodical when dealing with these issues.
Addressing Persistent Drips After Repair
Water leaks after repair often point to a bad cartridge or washer seal. Debris can get stuck during installation, causing leaks. To fix this, do a quick faucet leak troubleshooting by taking the faucet apart again. Look for any debris or misalignment in the parts.
“Patience is the most important tool in any plumber’s kit. If it leaks, take a breath, disassemble, and check your seals again.”
Fixing Overtightened or Loose Handles
Issues with the faucet handle can also cause problems. A stiff handle might mean you tightened the packing nut too much. On the other hand, a loose handle could be due to a loose set screw or misalignment.
To fix this easily, follow these steps:
- Loosen the packing nut slightly if the handle is difficult to turn.
- Make sure the handle is fully seated on the stem before tightening the set screw.
- Ensure all decorative caps are snapped into place to prevent moisture from entering the handle mechanism.
When to Call a Professional Plumber
While many repairs can be done at home, some need a pro. If you’ve tried fixing a diy faucet repair several times and it won’t stop leaking, there might be deeper damage. You should also call a plumber if you see:
- Corroded pipes that crumble when touched.
- Water supply valves that refuse to shut off completely.
- Complex, high-end electronic or touchless faucet systems.
Knowing your limits is key to easy home faucet repair. A professional plumber has the tools and experience to fix serious problems without harming your plumbing.
Conclusion
By taking charge of your home repairs, you protect your property and save money. A good DIY faucet leak fix keeps your kitchen and bathroom working well for years. This way, you avoid the high costs of calling a professional for small leaks.
Regular upkeep is key to avoiding plumbing problems. Keep a small stock of spare parts like washers and O-rings from Moen or Delta in your toolbox. These simple tips help you fix leaks quickly.
Don’t wait to fix a leak; it can save water and prevent damage to your sink. Quick fixes stop small problems from getting bigger. Your quick action keeps your plumbing system in good shape and boosts your confidence as a homeowner.
FAQ
What are the most important handyman tips for faucet leaks before I begin disassembly?
Before starting any faucet repair, first turn off the water supply valves under the sink. Also, plug the drain or lay a towel over it. This keeps small parts like Delta or Moen O-rings from falling down the drain.
How do I know which replacement parts to buy for my specific brand of faucet?
To find the right parts, look for the manufacturer’s logo on your faucet. Brands like Kohler, Pfister, and American Standard are common. If you can’t find a model number, remove the worn part and take it to The Home Depot or Lowe’s to match it.
Can I really learn how to fix a leaky faucet yourself without professional training?
Yes, you can. Most faucets are made for easy maintenance. By following a simple guide, you can fix leaks by replacing a worn-out washer or cartridge. This can save you money compared to hiring a professional.
What should I do if the faucet continues to drip after I have replaced the internal parts?
If the leak doesn’t stop after replacing parts, check the valve seat. Mineral deposits from hard water can corrode it. You might need a seat wrench or a dresser tool to fix it.
How can I tell the difference between a compression faucet and a ball or cartridge faucet?
Knowing the type of faucet is key. Compression faucets have two handles that twist to tighten against a washer. Single-handle faucets, like those from Grohe or Hansgrohe, use a ball or cartridge system. They don’t need the same twisting motion as a washer.
For more inspiration and ideas, visit: Hoome Estate